May 20, 2007

MBP: Something sweet

The best thing about MBP is that you get a chance to visit all the lovely blogs in detail, find a recipe that sounds new and interesting, and try it at home. MBP makes you scour through your friend’s blogs, reading their long written posts and memories. This time Coffee chose “Something Sweet” as the month’s theme. The monthly patrolling took me to Shilpa’s blog – where there was no dearth of sweets. I totally love her blog for a couple of reasons. Firstly, the name of the blog “Aayi’s Recipes (Mom’s recipes)” sounds very, very sweet to me. It reminds me of my own mom’s recipes whenever I visit her blog. Then there’s the beautiful header, the plethora of recipes, her clear style of writing, and beautiful pictures. There were plenty of sweets to choose from – so much so that I got confused. Time was running out and I settled on something that seemed interesting and new to me. The first sweet in Shilpa’s desserts list happens to be “Biscuit Pudding” and I decided to try it out.

I did not have “Marie” biscuits on hand and was going to substitute with Parle – G biscuits. Then I thought better of it; didn’t want the pudding to be a disaster. I followed the recipe as is, just took half the quantity of everything. Here’s how the pudding turned out:

Shilpa, after eating this we licked the chocolate from the vessel. Nope, it’s not bad manners:) Thanks Coffee for the beautiful theme and to Shilpa for this wonderful recipe.

May 18, 2007

The king of fruits


(This is my entry for the AFAM event started by Maheshwari and hosted this month by Deepa. The fruit this month is Mango.)

Mango is called the “King of fruits” with good reason. Every year, Indians wait for summer and the arrival of mangoes. No other fruit compares in taste and sweetness with mangoes. Famous varieties of mangoes include Himsagar, Alphanso, and Varanasi mangoes.

“Strip” was what my mom would say to my little brother when we were kids. He used to peel the fruit and suck the pulp. He used to eat mangoes in such a fashion that he would end up getting the pulp on his hands, legs, and chest. So, rather than spend her valuable minutes washing his clothes, mom would make him eat mangoes shirt-less. I would prefer cutting and eating the fruit. We used to buy mangoes by the dozen or sometimes buy the “peti” or box containing 3 dozen mangoes. A popular Sunday lunch in our house in the summer would be Amras-Puri. Dad would sit with a huge vessel and patiently take out the mango pulp. To this, we would add some sugar and enjoy with hot puris. Ooh, those days of eating endless mangoes. We used to bid farewell to mangoes in the same way as we do for Lord Ganesha by saying “Pudhchya varshi lavkar ya (Come soon the next year)”

In US, I have seen mangoes in couple of Indian shops. But they are still green. For the AFAM event, I picked up a can of sliced mangoes from the store. Here are two recipes featuring the king of fruits.

Mango Burfi

(Adapted from this recipe)
Makes: 7-8 barfis
Making level: Easy
Preparation time: 30 minutes

Ingredients
1.1 cup mango pulp
2.1/2 cup sugar
3.¼ cup ghee (butter)
4.7-8 cashewnuts – chopped into pieces
5.½ tsp cardamom powder
6.5-6 strands of saffron

Method
1.Heat 1 tsp ghee in a pan. Add the cashew nuts and fry till golden.
2.Heat a non-stick pot over medium heat. Add the mango pulp and stir.
3.As the pulp starts boiling, add the sugar and mix well.
4.Add the cashew pieces. Keep stirring as this mixture starts to thicken. Next, add the cardamom powder and saffron.
5.Add ghee in small amounts and keep stirring continuously. When mixture starts leaving sides of the vessel, remove from fire and pour it onto a greased plate.
6.Let the mixture cool completely. Cut into squares or diamonds.

Mango Lassi

Makes: 1 glass
Drink making level: Super easy
Preparation time: 5 minutes

To make the lassi:
1.Mix together ¼ cup mango pulp, 1/4 cup yoghurt (curd), 2 tsp sugar, ¼ cup water, ¼ tsp cardamom powder in the blender. Blend till smooth.
2.Add 1-2 ice-cubes. Garnish with chopped almonds and pistachios.

Verdict: I think I should have heating the mango barfi mixture for more time. It was a little bit jelly-like than a hard barfi. The barfis tasted great and looked inviting with cashew pieces embedded in them.
The mango lassi was totally refreshing. While making the lassi, I had no idea it would turn out so good. Unfortunately, I had less mango pulp remaining, resulting in a single glass. I and P were left snatching the glass from each other, taking turns to sip the lassi.

These two go to Deepa as my entries for AFAM-Mango. Deepa, everytime I visited your blog, that countdown meter reminded me how late I was in submitting the entries:)

May 15, 2007

Quesadillas with mushrooms


(My entry for the letter “Q” for Nupur’s A-Z series is Quesadilla.)

To all my readers: A big THANKS for visiting Swad. I started blogging in Jan and put up a site meter in March end. Counting from that day and including my own visits, Swad crossed 5,000 visitors. Thanks to all my friends, family, blog friends, and readers. Your comments and visits encourage me a lot!

Quesadilla is one dish that I always seem to mispronounce. It’s an exotic Mexican dish that uses tortillas with some stuffing. The first time I ate this dish was in a beautiful Mexican restaurant named “Bahama Breeze”. I would give an A+ grade to the ambience and décor of this restaurant. Anyways, out of the three vegetarian dishes they had on the menu, quesadilla seemed very tempting. And tempting it turned out to be. Beautifully presented with a pasta salad and cream on the side, the tortilla and the stuffing inside it were delicious.

According to me, the most boring day of the week is Monday. Yesterday was another such boring Monday that forced us out of our lazy weekend. Anyways, to shrug off some part of the boring day, we decided to make something different from the regular chapatti-sabzi we have for dinner. Decision made, we went out and purchased a pack of tortillas. I found two types of tortillas in the store – wheat (flour) and corn. I chose the wheat tortillas. These can also be made at home. For the stuffing, I chose my favorite vegetable, which happens to be mushrooms.

Quesadillas with mushrooms

(Adapted from Madhur Jaffrey’s World Vegetarian)
Makes: 3 stuffed tortillas
Cooking level: Easy (1/5)
Preparation time: 1 hour

Ingredients
1.4 corn or wheat tortillas (I used wheat)
2.1 tbsp oil
3.1 medium onion – cut into very fine half rings
4.2-3 green chillies – finely chopped
5.2 garlic cloves – peeled and finely chopped
6.1 pack of white mushrooms – chopped into 1/8 inch thick slices
7.1 tbsp coriander leaves (cilantro) – finely chopped
8.Salt and pepper to taste

Making the stuffing
1.Heat oil in a pan set over medium heat. Add the green chillies and garlic cloves. Fry till the garlic turns light brown.
2.Add the onion rings and fry till the onion turns light brown.
3.Add the mushrooms, cilantro, salt, and pepper. Saute for 4 minutes or until there is no liquid left at the bottom of the pan.

Heating the tortillas
If you are using store-bought tortillas, heat them in the following manner:
1.Heat a pan. Place a tortilla and cook for 30 seconds.
2.Now, turn the tortilla and cook the other side for 30 seconds.
3.Repeat this process till few brown spots appear on the tortilla. Cook each tortilla for a total of 2 ½ minutes.
4.The tortillas should be crisp.

Assembling the quesadilla
1.Place a tortilla on a plate.
2.Spread a quarter of the mushroom filling over one half of the tortilla.
3.Fold the empty side over the filled side.
4.Fill all tortillas in this fashion.
5.Serve hot with sour cream or with a dollop of guacamole.


Verdict: We loved the stuffing and the crisp tortillas. However, 3 for 2 left us longing for more. Hubby made another tortilla with salsa and ranch as the stuffing. This too tasted great. You can use other combination of veggies in the tortilla or simply make a cheese filling.

May 12, 2007

P is for...

(This is my contribution for the letter P in Nupur’s A-Z series)

Note: Of all the letters in A-Z, “P” happens to be my favorite letter. The reason – my hubby’s name starts with a P. P also happens to be such a versatile letter that I thought of many, many dishes starting with P. I was so hooked to this letter, that I even wrote a small poem on it. Check out at the end of the post.)

Last Monday, my dear friend A was all set to leave neighborhood and move to a brand new state and city far away from me. We enjoyed our last supper together and settled down to chat. I and A have spent considerable afternoons chatting about everything and nothing. I know all about her past jobs, family, schooling, friends and she knows about me. On this last afternoon, she mentioned that she loved a dish called “Papeta-Pur-Eedu”. She worked with a lot of Parsi colleagues in her last job, and got to taste the Parsi cuisine. She described that the Parsis break eggs on most of their dishes, even on okra. Papeta-Pur-Eedu is a famous Parsi dish and when A described how it tastes, I knew I had to make it. I confirmed and re-confirmed the dish name from her. A Google search rewarded me with the perfect recipe. Here’s how to make this fabulous dish.

Papeta-Pur-Eedu/ Eggs on potato baked dish

(Adapted from this recipe)
Serves: 3
Cooking level: Easy – Medium (2/5)
Preparation time: Around an hour

Ingredients
1.4 Medium size Boiled Potatoes chopped into cubes and sprinkled with salt & pepper
2.1 tbsp Cooking Oil
3.1 Medium Onion – chopped
4.1 capsicum – chopped (optional)
5.½ tsp cumin seeds
6.1 medium Tomato – chopped
7.2 Tablespoons Coriander - chopped
8.1 Tablespoon freshly ground Ginger/Garlic paste
9.1 tsp red chilli powder
10.½ tsp cumin powder
11.½ tsp coriander powder
12.¼ tsp tumeric powder
13.1 tbsp mild salsa (or 1 Cup Beef or Chicken Broth)
14.½ cup water
15.Salt to taste
16.2 eggs beaten with salt & pepper

How to make it:
1.Heat 1 tbsp oil in a pan. Add cumin seeds and after they change color, add the onions. Fry till the onions turn golden brown. Add the ginger-garlic paste and sauté for some time. Next, add the capsicum and fry for 3-4 minutes.
2.Add the turmeric powder, red chilli powder, cumin powder, coriander powder, and fry for 1-2 minutes.
3.Add chopped tomatoes and coriander leaves, cover and simmer over low flame for 5 minutes.
4.Add the salsa, salt, and ½ cup of water. Boil for 2 minutes. You can substitute the salsa with vegetable/chicken broth.
5.Add the chopped potatoes. Boil for 2-3 minutes. Turn off the heat.
6.Grease a baking dish with butter. I used my loaf pan. Spread the potato mixture in the baking pan. Pour the beaten eggs on the potato mixture.

(Ready to go in the oven)
7.Bake in a 350 degree oven for 15-20 minutes till the egg is semi-set. Do not over bake the eggs. Serve hot.

(Back from the oven)
Verdict
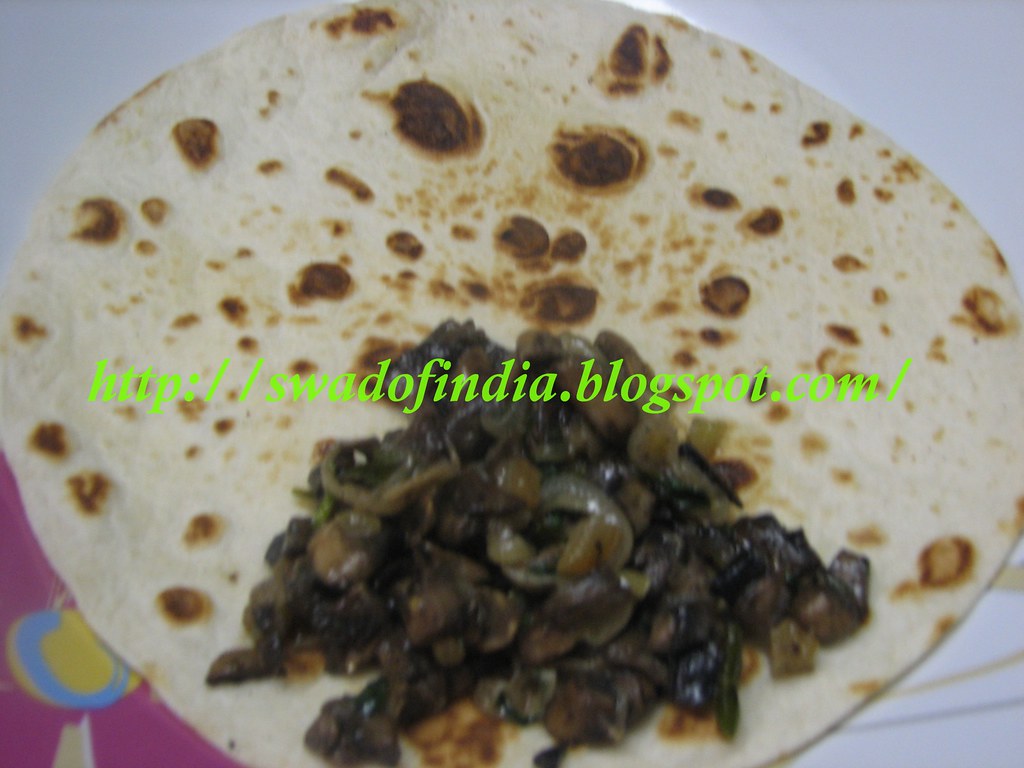
: Delicious, spicy, and heavy. Although, I was skeptical to break an egg on the potato mixture (as I had never done this before), the end result turned out amazing. You can roll this mix into a chapatti/tortiIla, wrap it in a taco, or eat it with bread. I will definitely be trying more dishes from the Parsi cuisine.

My last contribution for the letter P is none other than Pattice. This uses an onion-coriander filling in the potato patty.

Pattice

(Adapted from Mangala Barve’s Annapoorna)

Yields: 10-12 pattices
Cooking level: Medium (3/5)
Preparation time: 1 hour

To make the pattice:

1.Boil 4 big potatoes. Peel and mash them.
2.Take 4 bread slices. Dip and take out each slice in water. Squeeze out the water from the bread. Mix potatoes, breads, and salt into a dough.
3.Finely chop 1 big onion, 4 green chillies, and a bunch of coriander leaves.
4.Heat 1 tbsp oil in a pan. Add ½ tsp cumin seeds and ¼ tsp turmeric powder. Add green chillies and chopped onions. Fry till the onion turns light brown. Next, add 1/2 cup peas, ¼ tsp red chilli powder, ½ tsp garam masala powder, and salt to taste. Turn off the heat. Add the chopped coriander leaves in this mixture.
5.Take a small portion of the potato-bread dough in your hand. Press it between your hands. Now, bring your fingers together so that your hand makes cavity. Fill a small amount of onion-coriander mixture in this cavity. Close the cavity and press again so that it forms a cutlet.

(Before)
6.Heat a pan. Add a dollop of butter. Shallow fry 2-3 patties at a time. Serve hot with ketchup.

(After frying)
The pattice says:
1.Pour cooked chickpeas, shev, chopped onion, chopped coriander, tamarind chutney on me and enjoy me as Ragda – Pattice.
2.Hide me in a burger bun, and give me company of lettuce, sliced tomato, sliced onion, butter, chutney, and cheese. Enjoy veggie burger.
I took the pattice’s second advice.

This is my small, silly poem:
P is for Pani Puri, my favorite chat item
P is for Pasta, an Italian dish
P is for Palak, from which Popeye got his energy
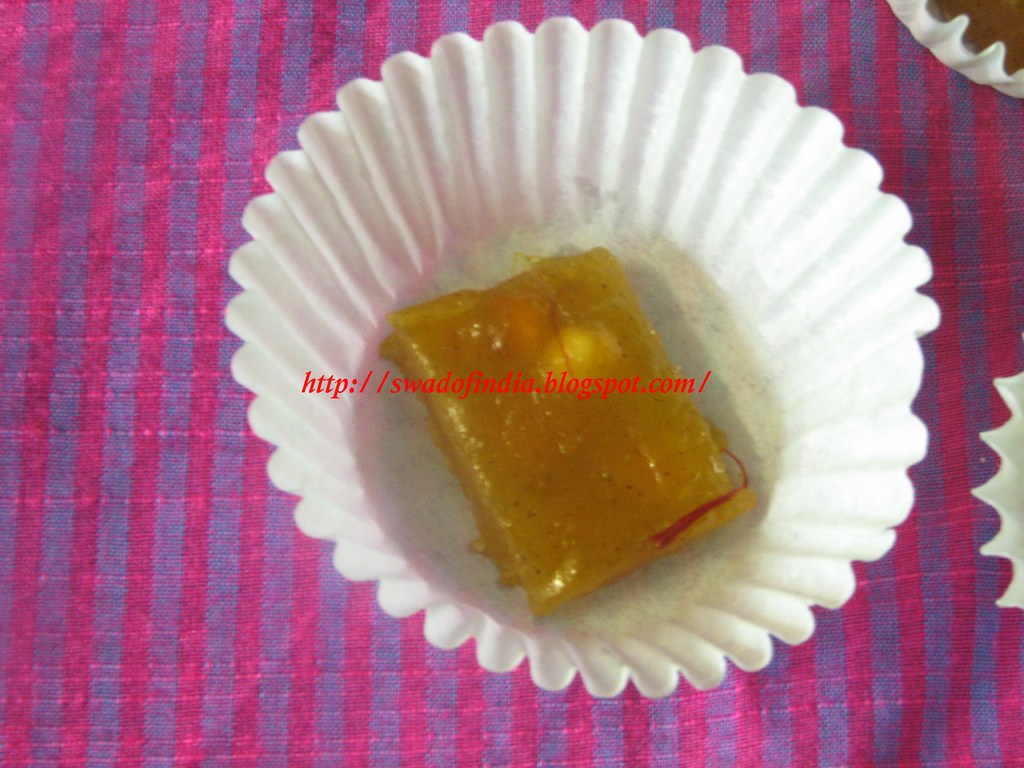
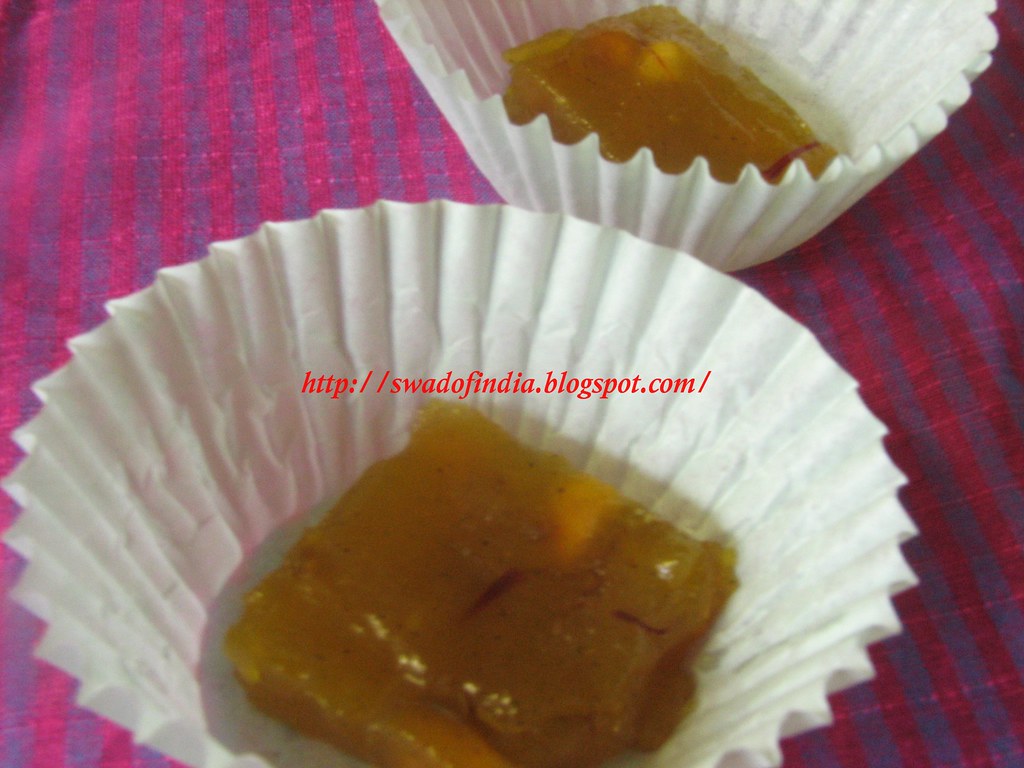
P is for Puran Poli, a yummy Maharashtrian dessert
P is for Pizza, bread topped with veggies
P is for Panchamrit, a unique combination of 5 ingredients
P is for Phulka, a puffed Indian roti
P is for Paneer, which gives birth to yummy vaggies
P is for Papad, enjoy it fried or roasted
P is for Pohe, my favorite breakfast item
P is for Paan, an Indian mouth-freshener
P is for Peas, use it as a combo with any veggie
P is for Pulav, delightful combo of rice and veggies
P is for Paratha, bread stuffed with veggies
P is for Pakoras, a mix of besan and veggies
P is for Pav-bhaji, spicy blend of veggies

May 11, 2007

Paneer Biryani


(This is my entry for the letter "P" in Nupur's A-Z series)

A unique combo of rice, vegetables, and spicies, this dish is loved by all. Café Noorani near Mahalaxmi serves the best biryani I have eaten till now. My non-veg eating friends would always tell me what I am missing out when I would not eat the Chicken Biryani. But, I feel that vegetable biryani has a charm of its own.

This recipe is from my male friend N, who happens to be an expert in making biryanis and pilafs. This guy is very special to me as he introduced me and my hubby. N and I are from the same college; he was my senior. Later, he joined company X and started working on the same project as my hubby. When I joined company X two years later, he introduced me and my hubby. Thus, started my love story. I often ate N’s head and made inquiries about what type of guy my hubby was. Over time, our friendship has really grown special. As I had written earlier, all these bachelors are expert at cooking some dish or the other. I keep warning them that if I meet their wives, I am going to spill my guts and name all their culinary successes. I will see to it that they spend at least one day per week in the kitchen

N had once made Paneer Biryani and I totally fell in love with it. It was awesome. I sat down with him and noted the recipe. Let me divide the process in four parts.

Paneer Biryani


Serves: 5-6
Cooking level: Medium – Tough (4/5)
Preparation time: Approx. 1 ½ hr

Making the rice
1.Wash 1 ½ cup of basmati (or any long grained rice) in 2-3 changes of water.
2.Add double the quantity of water.
3.Microwave for 12 minutes. The funda is we need half-cooked rice. So, using microwave works fine.
4.Take out rice from microwave and hold under running cold water. This helps in separating the rice.
5.I got this tip from Nupur’s biryani recipe. Add 10-15 saffron strands to a tablespoon of milk. Soak it for some time. Add this mixture to the cooked rice.


Frying the nuts and bolts:)
1.Heat 1 tbsp ghee in a pan.
2.Add ¼ cup of mized cashewnuts and raisins to the ghee.
3.Fry for some time. Drain on paper napkins and keep aside.

Making the gravy

1.Heat 1 tbsp ghee on medium flame.
2.Add 1 tsp cumin seeds, and after they splutter add 3 small sliced onions. Fry till the onions turn dark brown. Don’t loose your patience and keep frying.
3.Next, add 1 tbsp Hyderabadi Biryani masala, 1 tsp red chilli powder, ½ tsp turmeric powder, 1 tsp garam masala, and salt to taste.
4.Mix all the ingredients. Now, add 1 cup green peas and 2 cups of cauliflower florets. (You can add other veggies too). Again, mix the veggies and spices. Add 1 ½ cup water and bring it to a boil. When the vegetables are half cooked, add 1 packet of paneer. Stir well, taking care that you don’t break the paneer pieces.


Assembling the biryani
1.Preheat oven to 350 degrees.
2.Spread ghee on the sides of a baking pan. Add basmati rice and spread in a layer. Next, sprinkle the fried nuts on the rice. Now, spread a layer of the cooked vegetables. Repeat this process again.

3.Bake for 10-15 minutes.
4.Serve hot with raita.

Verdict: Simply delicious and spicy. Though the process is time consuming, the yummy biryani is worth it.

Check out other yummy biryanis from fellow bloggers:
1. Shilpa's Kofta Biryani, Making Biryanis, and Belgaum style biryani.
2. Pavani's Vegetable Biryani.
3. Asha's Easy Aloo Biryani and Three tier vegetable biryani.
4. Sig's Easy breezy chicken biryani and Tamil style mutton biryani.
5. Nupur's Vegetable biryani.
6. Sia's Veg biryani
7. Trupti's Veggie biryani

May 9, 2007

Palak Pakoras

(This is my contribution to the A-Z of Indian vegetables hosted by Nupur. The letter this week is “P”)


We seem to have purchased some kind of magical spinach from the grocery store. I used it twice to make vegetables still it hasn’t got over. It’s as if everytime I keep it in the fridge, it increases in quantity. Now, I am a big palak fan. But, I can’t eat it everyday. Then, there’s the dread that if I neglect it, it will wilt and die. Yesterday, in another futile event to use up the spinach, I made palak pakoras. The pakoras turned out good, but the mission remained unaccomplished.

Palak Pakoras/Spinach Fritters


Makes: 10-15 pakoras
Cooking level: Easy
Preparation time: 20 minutes

(Special thanks to hubby for leaving some pakoras to be photographed)
Ingredients:

1.¾ cup finely chopped spinach
2.1 cup besan
3.½ tsp ajwain seeds
4.½ tsp red chilli powder
5.¼ tsp turmeric powder
6.¼ tsp garam masala
7.Salt to taste
8.1 tsp hot oil
9.Pinch of baking soda
10.Oil for frying

Method:

1.Mix together all the above ingredients. Add water and make batter.
2.Heat oil in a pan on medium level.
3.Drop spoonfuls of batter in the oil and fry till golden brown. Drain the fritters on paper napkins and serve hot with ketchup.

I kept the pakoras in a bowl and soon saw them disappearing in my hubby's mouth. That's when I yelled at him to refrain from eating them before I could take snaps. His response, "Take a snap of the empty bowl, and write that the pakoras where here some time back." I didn't know whether to smile or sigh:)
Also on Swad:
Apple Pakoras
Egg Pakoras

May 8, 2007

Strawberry Banana Smoothie

(This one’s my contribution to Meeta’s Monthly Mingle. It’s an event that all food bloggers look forward to. The theme of the month is apt – “Spring is in the air”.)


Note of thanks: A big THANKS to Sig who provided me the link to a great watermarking software. Hugs to you, Sig!

After a long, long wait, winter has shut its doors and made way for spring. I had heard so much about spring since I came to US that I was looking forward to it for two reasons – I was terribly tired of the snow and cold, and because I had heard so much. Well, the wait was worth it. The trees were gifted back their dresses, the birds came out of their hiding places, the flowers smiled and welcomed spring, and we could finally go out without jackets Spring for me = vibrant colors. I wanted to make something that showcased my favorite color for the MM (Monthly Mingle).

I don’t know about you, but I sure do panic when I see fruits decaying. It’s as if I am murdering them, snatching away their life. I usually see to it that we consume fruits as soon as we buy them. But, my calculations go wrong at times or we concentrate our attention on eating other stuff, leaving the fruits scorning at us from the table or refrigerator. This time there was a whole pack of strawberries and couple of bananas that were demanding our attention. I was pondering what to do with them when I remembered that I had a recipe and I wanted to make a smoothie since a long time.

So, what’s exactly a smoothie? It’s a cool, refreshing beverage prepared by blending together fruits, juices, or chocolates. It’s quite similar to a milkshake. Most of the supermarkets sell smoothies in different brands and flavors, but if you have all the ingredients at home, then why not have fun while making a smoothie at home? Some time back, Nupur had made Giant Cauliflower Puff from a wonderful book highlighting breakfast items. I was lucky to find the same book in my local library.

Strawberry Banana Smoothie

(Adapted from Mollie Katzen’s Sunlight Café)
Serves: 1
Drink making level: Easy
Preparation time: 10 minutes

To make the smoothie:
1.Blend together ½ cup orange juice, 1 medium-sized ripe banana, 8-10 large strawberries, and ½ cup vanilla yoghurt. Puree to the desired consistency. The author mentions that a smoothie need not be smooth. So, if you like to have some fruit chunks in your smoothie, blend accordingly.
2.Add 1-2 tbsps lemon juice to the smoothie. Serve cold.

Delightful reads:
1.Nupur would hate to leave back her blender in the event of her home being on fire:)
2.Mango Smoothie
3.Breakfast smoothie
4.Mixed berry smoothie
5. Orange strawberry smoothie
6. Banana Fig smoothie
7. Mixed fruit smoothie

May 7, 2007

Papad Pohe

(This is my contribution to Nupur’s A-Z series of Indian vegetables. The letter of the week is “P”.)


My aunt stays in Surat, far away from all of us. She keeps insisting that we visit her but it used to prove difficult with the college and later the job schedule. We used to be on the look out for a chance to visit her. You see, she has this beautiful terrace flat in which we can relax and watch TV the whole day. Another event that used to tempt us to take leave and visit her would be the kite flying festival. Right from the end of November to the day of Makar Sankranti, the Surat sky is filled with kites of all shapes, sizes, and colors. Kites are available at all prices ranging from Re.1 to Rs. 1,000 and beyond.

I and my two brothers were lucky to take time from our schedules and travel to Surat in December. My aunt has a son who proves to be the perfect entertainment for all of us. He’s cute, mischievous, and has a horrible temper at the same time. The four of us would do nothing else but kite flying the whole day, coming down from the terrace only when our stomachs complained of hunger. Poor aunt used to prepare food in advance in anticipation of our hunger cries. One such dish that I loved owing to its spiciness and crunchiness is Papad Pohe. They are more like Chivda and serve as an amazing snack for tea-time. Though I did not pay more attention to the ingredients of this fabulous snack while gobbling them, I tried to re-create this recipe on my own).

Papad Pohe

(Adapted from my aunt’s recipe.)

Serves: 1-2
Recipe cooking level: Easy
Preparation time: 15 minutes

You will need:
For the spicy poha:
1.2 cups thin poha
2.2 papad
3.Salt and sugar to taste
4.1 tsp red chilli powder

For tempering
1.1 tbsp oil for frying
2.1 tsp mustard seeds
3.1 tsp cumin seeds
4.Pinch of asafetida
5.½ tsp turmeric powder
6.5 green chillies
7.10-15 curry leaves
8.¼ cup roasted groundnuts

Method:
1.Heat oil in a pan and fry the papads. Break the papad in pieces.
2.Finely chop the green chillies.
3.Place the poha in a microwave safe bowl and cook for 3 minutes. When done, add salt, sugar, red chilli powder, and the fried papads in the poha.
4.Heat 1 tbsp oil in a pan. Add the cumin and mustard seeds. When they splutter, add asafetida, turmeric powder, green chillies, and curry leaves. Saute for a minute. Now, add the roasted groundnuts and fry for 2-3 minutes. Pour this tempering in the spicy poha.
5.Mix well. Store the papad pohe in an airtight container.

Verdict: This crunchy poha tastes great with the occasional crunchy munch from the papads and the groundnuts. You can add some cashews too for some extra crunch. This is a wonderful snack for the kids in the May vacation.

May 5, 2007

Omelette with veggies


The first time I ate vegetable omelette was in Denny’s while we were coming back from our Niagara trip. The omelette was so heavy that I could not finish it. But, it was the best omelette I had eaten all my life. Nupur’s A-Z series gave me a chance to try it at home. This recipe gave me a basic idea of making the omelette. Here’s how I made omelette with veggies.

1.Heat oil in a skillet over medium heat. Add ½ cup of mixed veggies of your choice. I added onions, tomatoes, mushrooms, broccoli, capsicums. Fry till the veggies are cooked. Then add salt to taste, a pinch of red chilli powder, and pour some soy sauce in the veggies. Pour this mixture in another dish.

2.Add salt and pepper to 3 well beaten eggs.

3.Spray the skillet with some non-stick spray. Add eggs, allowing them to cover the bottom of the pan. Cook for 3 minutes, or until the bottom begins to set.

4.When nearly cooked, top half of the omelette with the cooked veggies. Add some Parmesan cheese over the veggies.

This is an amazing breakfast for a lazy Sunday morning. And yes, it can substitute lunch as well. Sending this as my entry for "O" in the A-Z series.